Using the USGS LCC Data Base in Arc/Info
There are several sources of vegetation data for the United States available on the world wide web. Many of those data sets are referred to in my research documentation. One of the best sources of vegetation data that can be utilized in a GIS is the USGS Land Cover Characteristics data. This data is part of a project to develop one kilometer vegetation data for the entire world. The data can be found at the web site http://edcwww.cr.usgs.gov/landdaac/glcc/glcc.html.
The U.S. Geological survey is developing this data in cooperation with the the University of Nebraska-Lincoln and the European Commission's DG Joint Research Centre. The data is being generated from 1-km Advanced Very High Resolution Radiometer data. The data for North America is available in two projections and six formats. The data can be obtained in either the Interrupted Goode Homolosine Projection or in the Lambert Equal Area Projection. The most detailed version of the data is referred to as the North America Seasonal Land Cover Region set and has 205 vegetation classifications. These classifications can be found at the LCC Legend.html.
Using the Data in Arc/Info
Although this data base is public domain, the conversion of the data to an Arc/Info usable format is not completely obvious. The following is the process that I used to make the vegetation data useable in Arc/Info.
Arc/Info directly supports the Lambert Azimuthal Equal Area projection so it is more convenient to use the data in this projection (especially if the coverages are to be projected into other coordinate systems). Once the desired data set is decided upon the file can be either downloaded off the web directly from the North American Land Cover Lambert Azimuthal Equal Area Projection File Listing found at http://edcwww.cr.usgs.gov/landdaac/glcc/tablambert_na.html or it can be obtained via ftp from ftp edcftp.cr.usgs.gov in the directory /pub/data/glcc/na. The files are on the order of 83 megabytes so gziped files are available.
The files are of .img format which is easier to use with some programs than others. There is a public domain program called ____ which can be used to view these images and can be obtained from NASA's web site (although time was not used to learn this application).
To use the data in Arc/Info the data must be converted from the .img format to a grid. First the file should be unzipped if the zipped version was downloaded. The unzipping comand in a UNIX environment is as follows.
gunzip <lcc.img>
Next the file needs to be given a "bil" extension.
mv <lcc.img> <lcc.bil>
Then a header file needs to be made for the bil file. This header file contains information on the size and location of the data set. The file can be made in any type of text editor, but it needs to be saved in the same directory as the 'bil' file and have the same name as the bil file.
lcc.hdr
The metadata needed for the header files can be found at http://edcwww.cr.usgs.gov/landdaac/glcc/nadoc.html under geometric characteristics. The header file created for the Seasonal Land Cover data set was as follows (words in parenthesis are only for explanation, do not use in actual file).
|
nrows |
8996 |
(Number of rows in the data set) |
|
ncols |
9223 |
(Number of columns in the data set) |
|
nbits |
8 |
(The bit size of the image 0 |
|
ulxmap |
-4486549.963 |
(The x-coordinate of the upper left corner of the image) |
|
ulymap |
4479868.288 |
(The y-coordinate of the upper left corner of the image ) |
|
xdim |
1000 |
(Number of meters in x direction for each pixel) |
|
ydim |
1000 |
(Number of meters in y direction for each pixel) |
There should now be at least two files in the working directory; <lcc.img> and <lcc.hdr>.
Now in arc convert the bil file to a grid file using the IMAGEGRID command.
Arc: imagegrid lcc.bil lcc
Use arc to update the information on the projection using the PROJECTDEFINE command.
Arc: projectdefine lcc
Project: projection lambert_azimuthal
Project: parameters
radius of sphere of reference [0.00000]: 6370997
longitude of center of projection [0 0 0.000]: -100 0 0.000
latitude of center of projection [0 0 0.000]: 50 0 0.000
false easting (meters) [0.00000]: 0.00000
false northing [0.00000]: 0.00000
(all of the above projection parameters for my file were taken from the Lambert Azimuthal Equal Area Projection Parameters found at http://edcwww.cr.usgs.gov/landdaac/glcc/nadoc.html#lamb. These may change depending on the dataset being used.)
5. SEPARATING THE DOMAIN OF INTEREST
Up to this point the data in the working directory is for the entire North American Continent. If only a small section of this file is needed, processing time can be saved if that area is isolated. The Arc/Info functions found in Grid are useful for isolating that area.
The first step is to identify the area that is to be isolated on the grid of North America. Go into Grid in Arc to view the file.
Arc: grid
Grid: display 9999 (opens a viewing window)
Grid: mapextent lcc (sets the range of the window to that of the file)
Grid: gridpaint lcc (paints the file in color, use gridpaint lcc value linear nowrap gray for a gray image, and clear to erase any image)
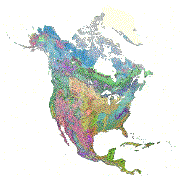
Now the area of interest must be selected from the file. Water landmarks can be used for orientation in the file. The AVHRR value read for all water is the same and is shown in black in this display. Either lakes or the shoreline of the continent can be used to locate the desired domain. When in doubt always allow for extra area that can be removed later. The user interface on the view window will let you zoom in and out in the file if more detail is desired. Now separate the region of interest.
Grid: setwindow * (This will let the user draw the borders of a rectangle which will be the area of the new file. Use the curser in the image window and click the mouse button to make two opposite corners of the selection rectangle.)
Grid: lcc2=lcc (Creates and names the smaller grid)
Grid: clear
Grid: setwindow lcc2
Grid: gridpaint lcc2
You should now see a much smaller and more convenient file. The process can be repeated if needed (The clip command in Arc can also be used later).
The grid file that is now in the working directory does not have an attribute tale at this point. The only data that this file contains is the numerical value that represents the land cover type for each separate square kilometer. There are a couple of ways to complete the attribute table for the file depending on the software available to the GIS technician. One method is to use Info. Another is to use Arcview if that program is available.
6a. AN INFO METHOD